Notes, tags, custom fields, and the activity log
Every purchase order carries a set of annotation and history tools on its detail page: freeform Notes, quick-label Tags, structured Custom Fields, and a read-only Activity log. Use them to record context for your team, organize the list, capture data your own workflow needs, and audit exactly what changed and who changed it.
All four live as tabs near the bottom of the purchase order page. The examples use the demo order PO-DOCS-0001 — supplier Acme Supplies, destination Main Warehouse, three lines.
Before you begin
- Open the order first: go to Orders → Purchase Orders, then open PO-DOCS-0001. The Notes, Tags, Custom Fields, and Activity tabs sit below the order's line items.
- Adding notes, changing tags, and editing custom fields all require the Update purchase orders permission. Without it, these tabs stay readable, but the add fields, pin/delete controls, and closable tag chips don't appear.
- The Activity log is read-only for everyone — there is nothing to enable.
Add and pin notes
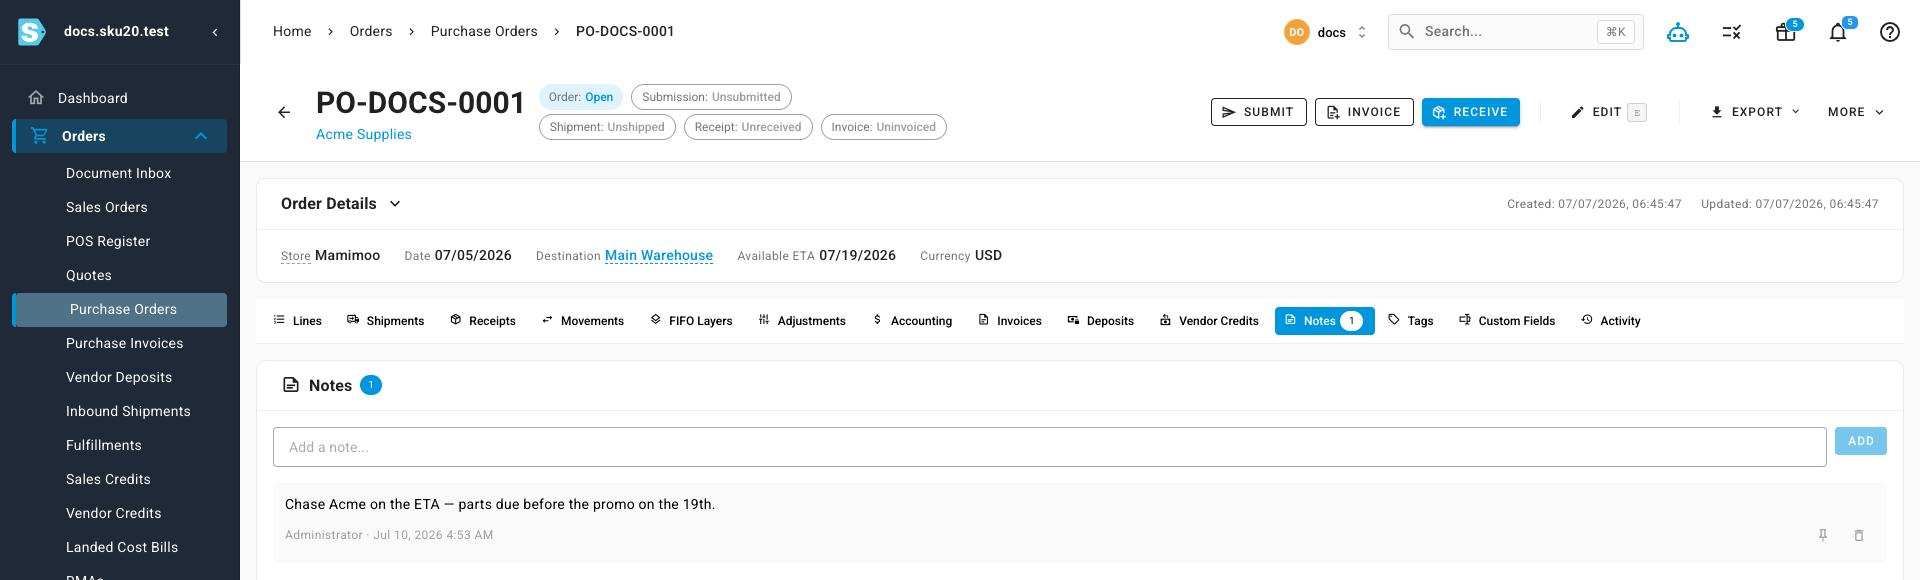
Notes are freeform comments for your team. Each note records who wrote it and when, and you can pin the important ones so they stay in view no matter which tab is open.
- On the order, open the Notes tab. The tab shows a count badge when notes exist.
- Type your note in the Add a note... field.
- Click Add, or press Enter. The Add button stays disabled until you type something. The note appears in the list, stamped with your name and the current date and time.
What you'll see: your note at the top of the list with your name and a timestamp, and the tab's count badge increases by one.
Pin a note so it stays visible
Pinning lifts a note out of the regular list into a highlighted band that sits above the tab bar — so it stays on screen even when you switch to the Tags, Custom Fields, or Activity tab.
- Find the note in the list and click its pin icon (hover text: Pin note).
- The note moves into the highlighted Pinned band above the tab bar, so it's visible from any tab on the order, not only the Notes tab.
- To unpin, click the Unpin icon on the pinned note. It returns to the regular list.
Delete a note
Click the trash icon on any note to remove it. You can delete a pinned note directly from the pinned band above the tabs.
There is no confirmation prompt and no undo — the moment you click the trash icon, the note is gone. Delete with care.
Your in-progress note text is preserved if you switch to another tab and come back, so you won't lose a note you haven't added yet. When an order has no notes, the tab reads No notes yet.
Tag a purchase order
Tags are short labels you attach to an order to group and find it later (for example rush, seasonal, or a project name). Tag changes save immediately — there is no separate save step.
- Open the Tags tab.
- In the Type to add a tag... field, start typing. Matching existing tags appear in the dropdown — select one to apply it.
- To create a brand-new tag, type the full label and press Enter. The dropdown prompts you with Press Enter to create "...".
Each applied tag shows as a chip. To remove a single tag, click the x on its chip. To clear every tag at once, click Clear all and confirm in the Clear all tags? dialog.
Because each change saves immediately, a failed save rolls the tags back to their previous state and shows an error — you'll never end up with a half-applied change.
Tags you add here also surface on the purchase order list as a column and a quick-access pill, so you can filter and scan by them there. See Browse and manage the list and List columns and filters.
Fill in custom fields
Custom fields are structured, admin-defined fields specific to your business — for example a project code, a freight forwarder, or an internal reference. An administrator defines which fields exist for purchase orders; you fill in their values per order.
- Open the Custom Fields tab. The tab badge shows how many values are set.
- Enter or select a value for each field. Fields flagged to also appear on the order summary carry an eye icon labelled Visible in order details.
- Click Save Changes. The button is disabled until you actually change something, and the panel shows an Unsaved changes, then Saving…, then Saved indicator as you go. To abandon your edits, click Discard.
What you'll see: the Saved indicator once the values are stored, and the tab badge updates to reflect how many fields now have a value.
If no custom fields have been defined for purchase orders yet, the tab reads No custom fields defined for this record type with a Manage in Settings link to set them up. To add or change the field definitions themselves, use the Manage in Settings link, which opens Settings → Custom Fields → Purchase Orders.
Custom field values are editable while you edit the order header — in that case the pending values are saved when you save the header rather than from this tab. Set custom field columns also appear on the purchase order list and can be used in advanced filters. For header editing, see Edit a purchase order and its line items.
Review the activity log
The Activity tab is an audit trail — a time-stamped, read-only history of everything that has happened to the order, showing who changed what and when. It captures changes to the purchase order itself, to its individual line items, and to any supplier invoices linked to it. The list is paginated and searchable.
- Open the Activity tab. Entries are listed newest first, with a running entries count.
- Read across each row: ID, Date, User (the person or System that made the change), Event, Source, Subject (which record changed — the PO, a line, or an invoice), and Details. For an update, Details shows each changed field as old → new.
Narrow the log
- Type in the Search activity... box to match by user, event, or the change details.
- Use the Event filter to show only Created, Updated, Deleted, or Bulk Upsert entries.
- Use the Source filter to isolate where a change came from — for example Manual, Import, PO Receipt, or a specific sales channel sync.
- Use the column selector to show or hide columns.
When a single action changes many records at once, the log collapses those entries into one group row showing the event and a count (for example updated × 12). Click the group row to expand it and see each underlying entry; click again to collapse. The group's summary count doesn't change when you expand it.
Because invoice changes appear here too, the activity log is a good companion to Record a supplier invoice when you need to trace a billing discrepancy.