Receive returns at the Receive Station
The Receive Station is the scan-driven counter for putting customer returns away. Instead of finding the RMA first and opening its receive grid, you stand at the bench, scan whatever the parcel gives you — an RMA number, the original order number, or just a product barcode — and the station resolves it, applies your disposition policies, and stages the units. It's the fastest way to receive, and it's the only receiving path that can take a parcel with no known RMA (a "blind" return) and still land the stock.
Three doors lead to receiving: the Receive button on an RMA list row, the Receive Items button on an RMA's detail page (both covered in Process a customer return), and this station. Reach for the station when parcels arrive faster than you can look them up.
Before you begin
You need the returns.receive permission. Without it the page shows an info alert instead of the scan field — ask an admin to grant the role.
Find the station at Orders → RMAs → Receive Station (route /v2/rma/receive-station), or from the Receive Station tab in the Returns navigation strip.
1. Choose the receiving warehouse
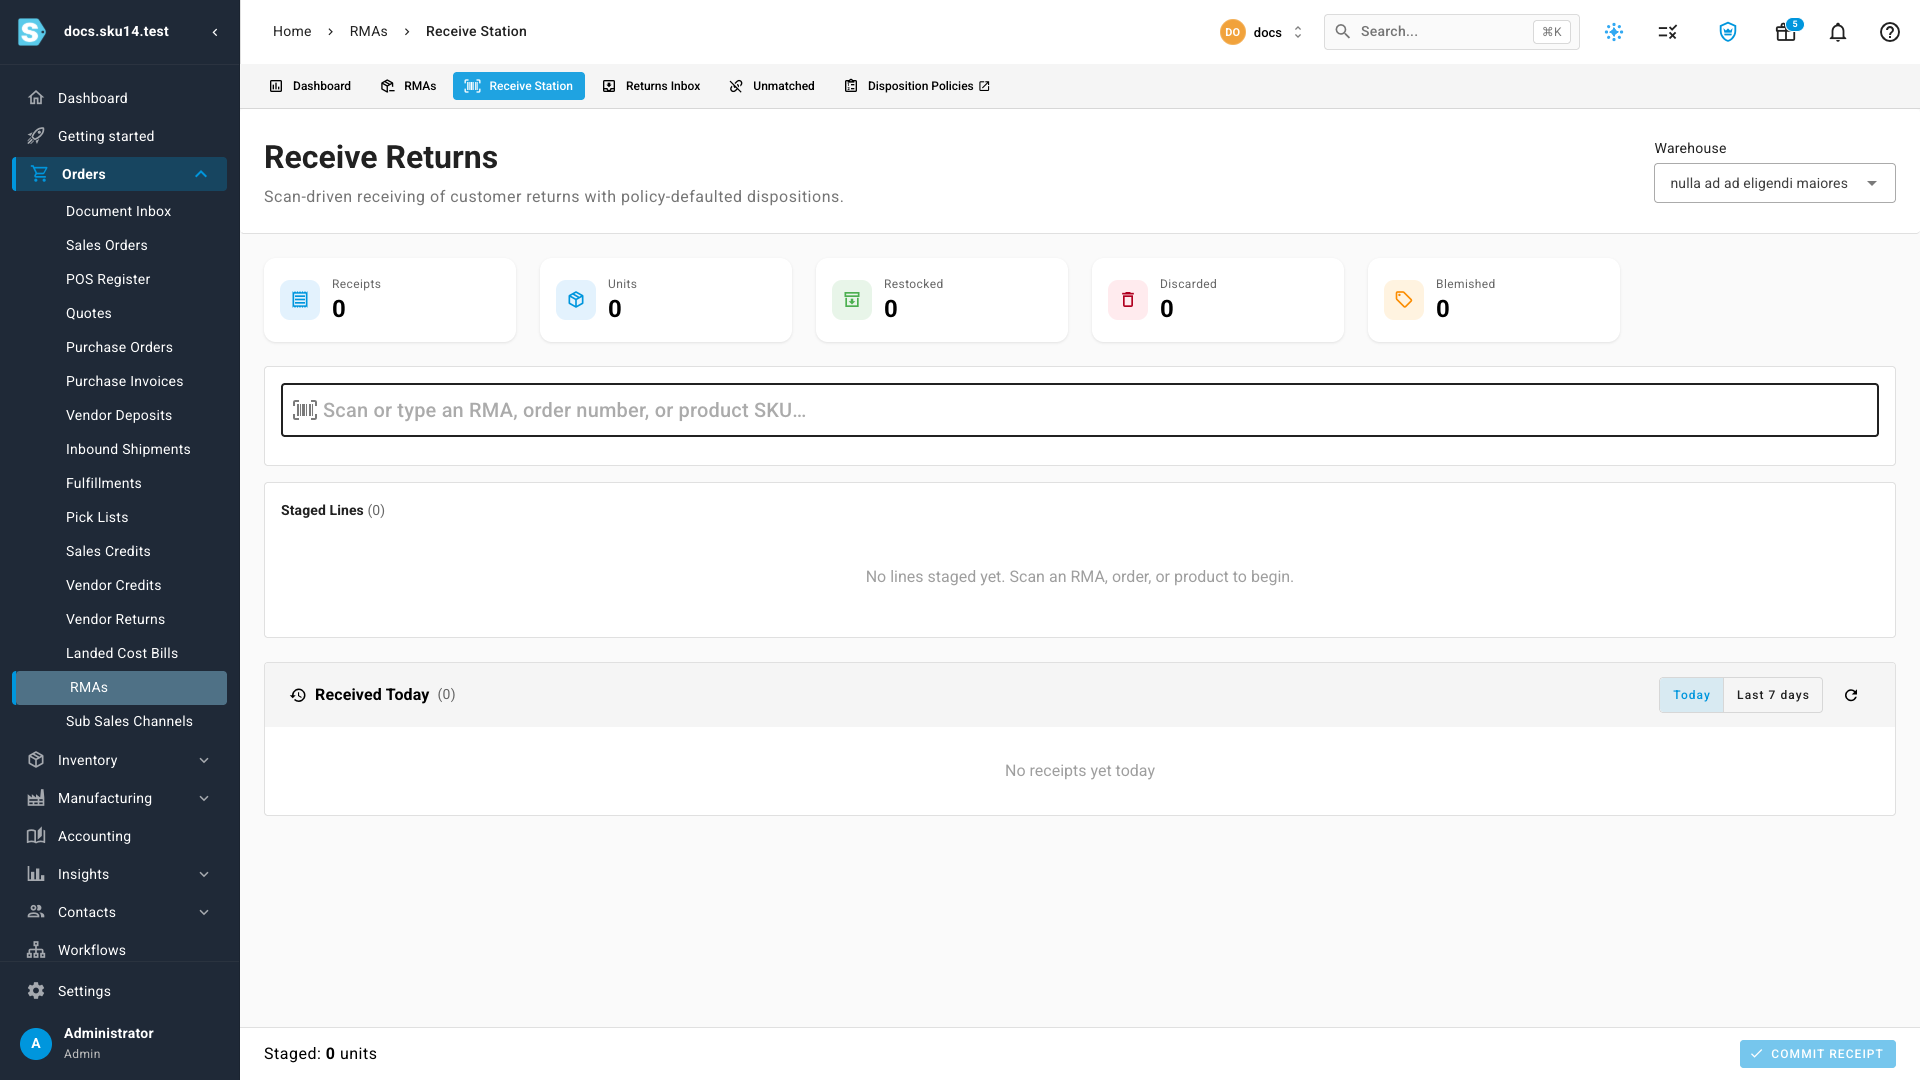
Pick a Warehouse from the selector at the top-right before you scan anything — the scan field stays disabled until you do. Your choice is remembered per browser, so a station at the returns dock only picks it once.
2. Scan the return
The big Scan or type an RMA, order number, or product SKU… field is the whole workflow. Scan a barcode (or type a value and press Enter), and the station resolves it in this order:
- Open RMA by number — an authorized return matches, and its expected lines load.
- Open RMA by tracking number — a carrier label matches an RMA that's in transit.
- Sales order by number — no RMA, but the original order matches.
- Product by SKU or barcode — the scan is a product; the unit stages on its own (see When there's no match).
- No match — nothing resolves.
When an RMA or order resolves, a match context chip appears above the staged lines — primary-colored for an RMA, purple for an order — so you can see at a glance what the parcel is attached to. If that RMA or order carries notes, a pulsing warning chip appears too; click it to open the Order Notes dialog before you receive (a customer may have asked for something special).
Re-scanning the same product just increments its Qty on the staged line, so you can scan a box of ten identical units ten times.
3. When there's no match
A scan that resolves to nothing meaningful behaves one of two ways, depending on the tenant's Allow Blind Receiving setting (see Configure returns settings):
- Blind receiving ON — scanning a known product SKU stages a blind line: the unit is real stock, but it's received with no RMA behind it. It lands in inventory and shows up in the Unmatched Returns report until someone reconciles it to an order or RMA.
- Blind receiving OFF — an unmatched scan is a hard stop. A warning appears with an Enable blind receiving button (needs the settings.update permission) that deep-links straight to Settings → Returns, or an "Ask an admin" prompt if you can't change settings. At the same time the find-the-order panel opens automatically so you can search for the original order and attach the parcel to it — which auto-creates a linked RMA on the spot.
Blind receiving is Disabled by default. Turning it on trades speed for a reconciliation queue, so it's a deliberate choice — see How returns reconciliation works for the trade-off.
4. Stage and disposition each unit
Every scan adds a row to the Staged Lines table. Each row is one unit (or a Qty of identical units) and carries its own disposition:
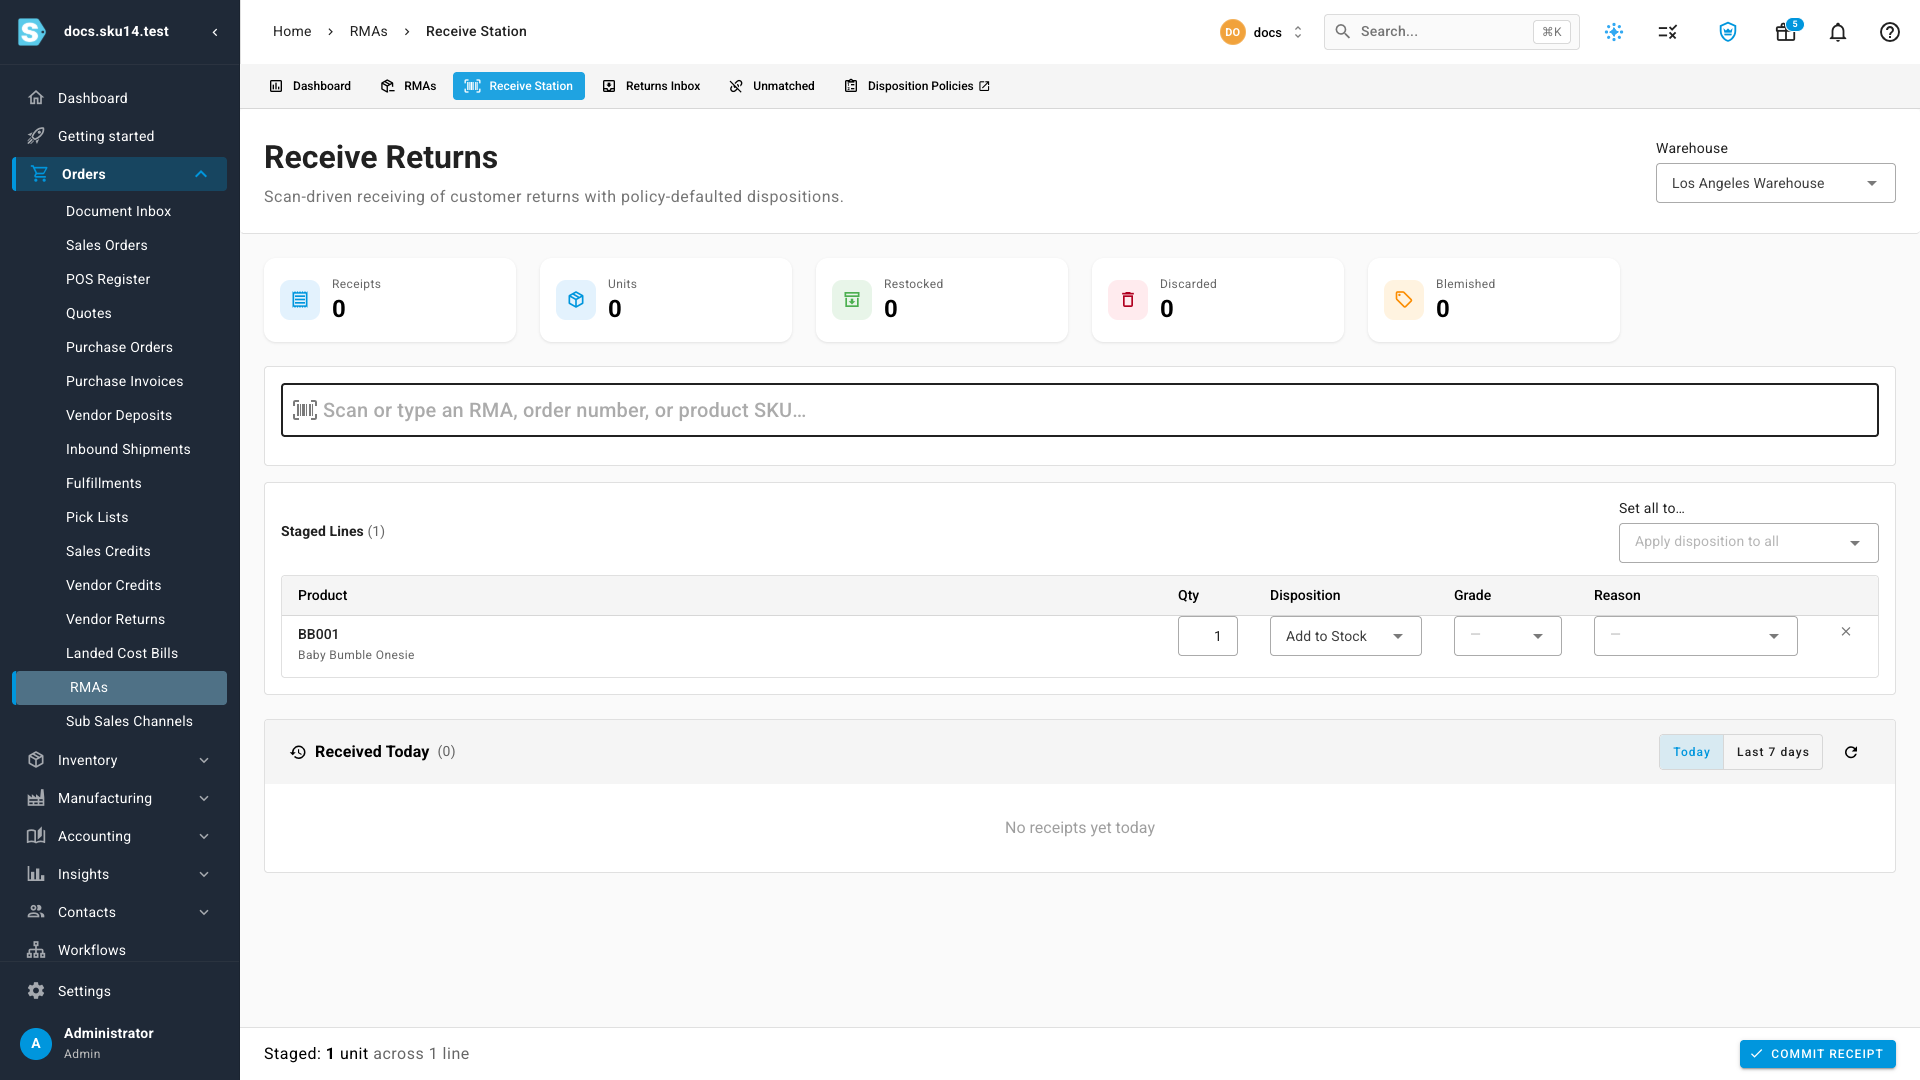
| Column | What it does |
|---|---|
| Product | The item and SKU. A Policy chip shows the disposition your policies auto-applied; a Not on RMA chip flags an unexpected item the RMA didn't list. |
| Qty | Units on this line. Re-scanning the same product bumps it up. |
| Disposition | Where the unit goes: Add to Stock, Discard, or New Blemished SKU. |
| Grade | Condition grade — A / B / C / Unsellable. |
| Reason | The return reason for this unit. |
| ✕ | Removes the line. |
The three dispositions do different things to inventory:
- Add to Stock restocks the original SKU as a new FIFO layer — the unit is sellable again.
- New Blemished SKU lands the unit on a separate blemished SKU so it never ships as new; a Configure SKU button opens the config to choose or create that SKU.
- Discard adds nothing back — the unit is scrap.
Grade and Reason feed the policy engine: changing a line's Grade or Reason automatically re-applies the matching disposition policy — unless you've manually overridden the disposition, in which case your choice stands. To blanket-set the table, use Set all to… to apply one disposition to every line at once.
Lot- and serial-tracked items capture their identifiers inline. A lot-tracked Add to Stock line shows a lot-capture sub-row; a serial-tracked line captures each returned serial. Commit Receipt stays disabled until every lot is valid — hover the button for a tooltip explaining what's still missing.
5. Commit the receipt
When the bench is empty and the table is full, click Commit Receipt in the sticky footer. The Confirm Receipt dialog is the last check before stock moves:
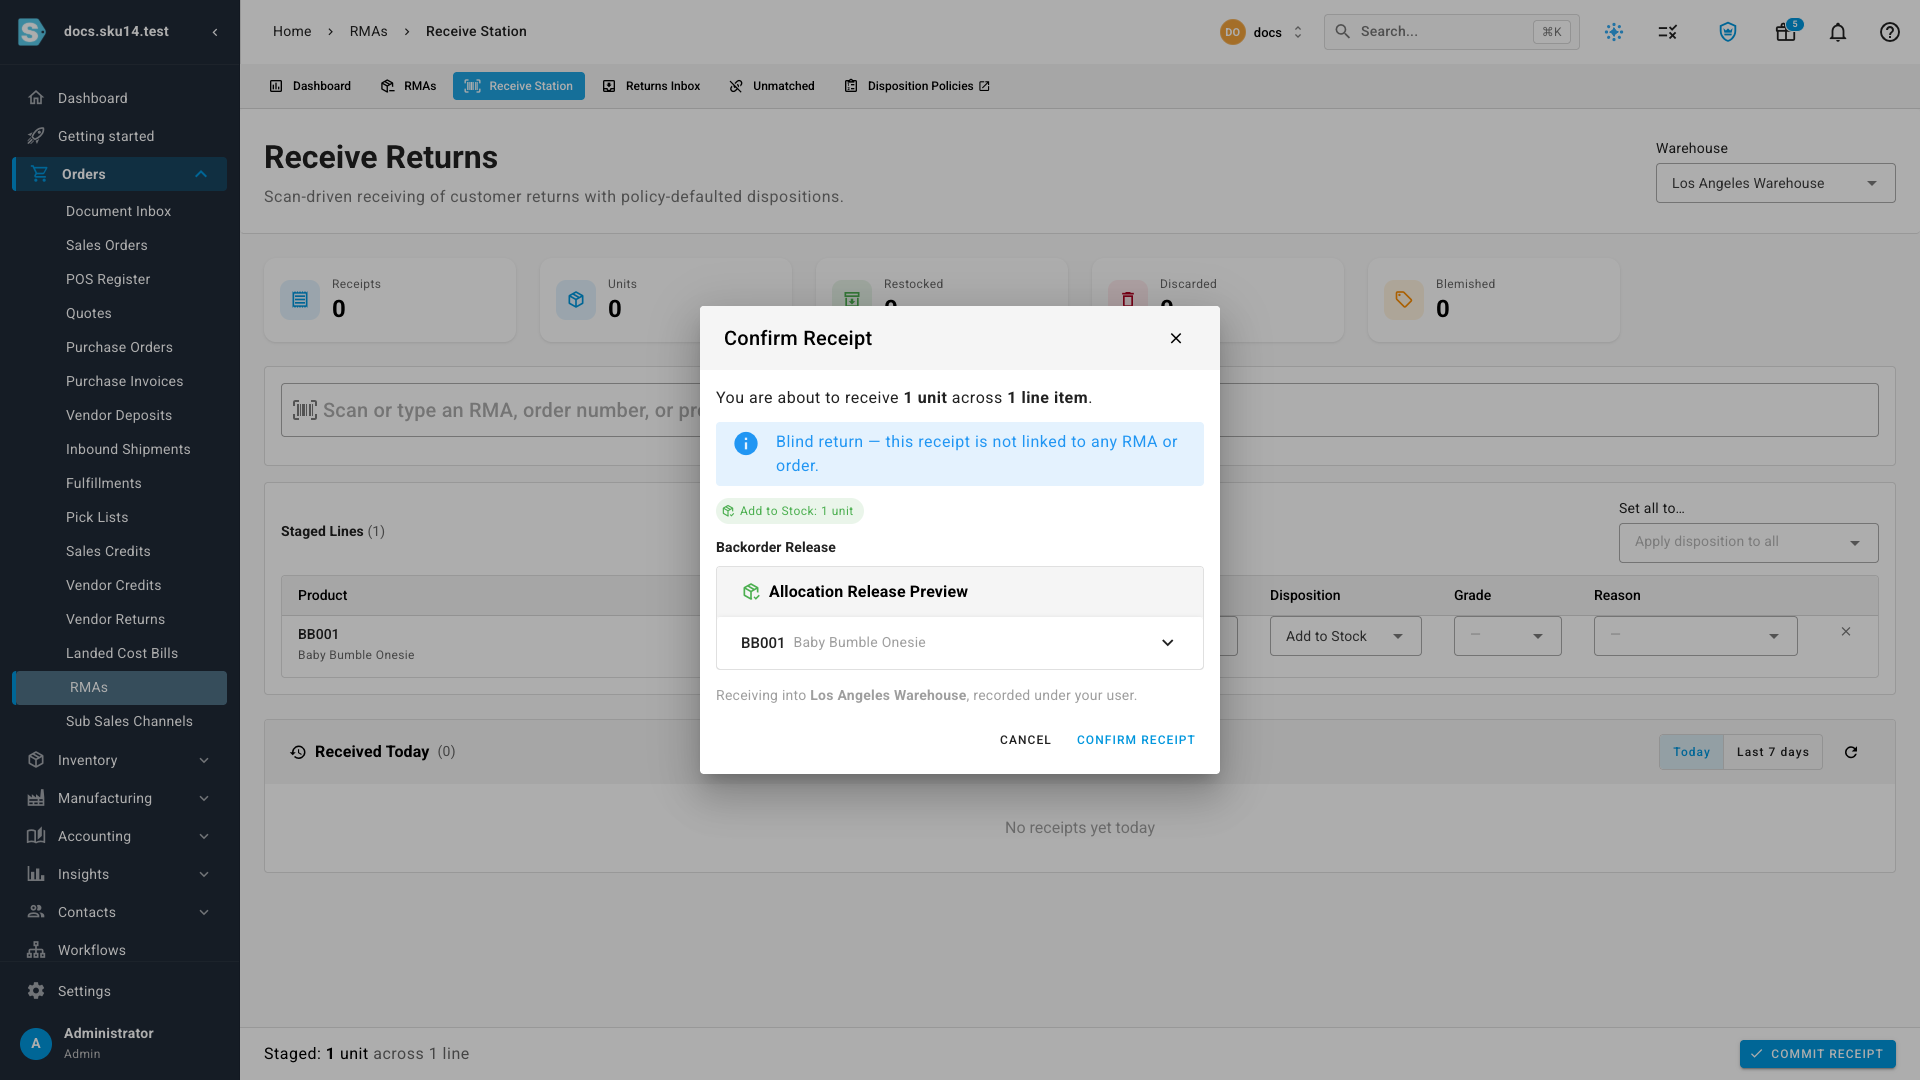
The dialog shows:
- Total units and line items you're about to receive.
- Destination — the matched RMA or order, or a blue "Blind return — this receipt is not linked to any RMA or order" alert when nothing was matched.
- A disposition breakdown (e.g. Add to Stock: 1 unit).
- An over-receive warning if you're taking more than the RMA expected, and an "N lines not on RMA" note for unexpected items.
- An order-notes reminder if the RMA or order had notes.
- A Backorder Release preview — restocked units can immediately release backorders waiting on that SKU, and the preview lists exactly which allocations would fill.
Click Confirm Receipt to commit. Stock moves, any releasable backorders fill, and the session resets for the next parcel.
Track your session
The five KPI cards across the top — Receipts, Units, Restocked, Discarded, Blemished — count this session's work, so a shift can see its own throughput at a glance.
Below the staged lines, the Received Today / Last 7 days panel is the shift-handover log: each committed receipt appears with its RMA link, or a blind + unmatched chip when there was no match. Toggle Last 7 days to see the wider window, or hit refresh to pull the latest.
Related
- Process a customer return (RMA) — the full RMA lifecycle and the other two receiving paths.
- Link unmatched (blind) returns — reconcile blind receipts to an order or RMA.
- Set up return disposition policies — the rules that auto-fill each line's disposition.
- Configure returns settings — the default warehouse and the Allow Blind Receiving toggle.
- How returns reconciliation works — where blind receipts go and how they settle.
Video transcript
The Receive Station receives returns by scanning. Pick your warehouse, then scan an RMA, an order number, or a product barcode. Each unit stages with a disposition your policies pick — back to stock, blemished, or discarded. No match? Scan the product to receive it blind, or attach it to the order. Commit the receipt, and stock moves — even releasing backorders waiting on it.