Configure returns settings
Before the first parcel comes back, four settings decide how returns behave: the warehouse returns default to, whether the dock can receive blind, the reasons operators pick from, and which warehouses are kept out of demand planning. They live in two places — the returns settings page and each warehouse's own settings — and you set them once, up front. This guide walks an admin through all four.
Before you begin
- You need the settings.update permission to change the returns settings page and the warehouse toggle.
- At least one warehouse should already exist — you'll pick one as the returns default.
1. Set the default returns warehouse
Go to Settings → General → Returns (route /v2/settings/general/returns). The page subtitle reads "Configure default warehouse and receiving rules for returns."
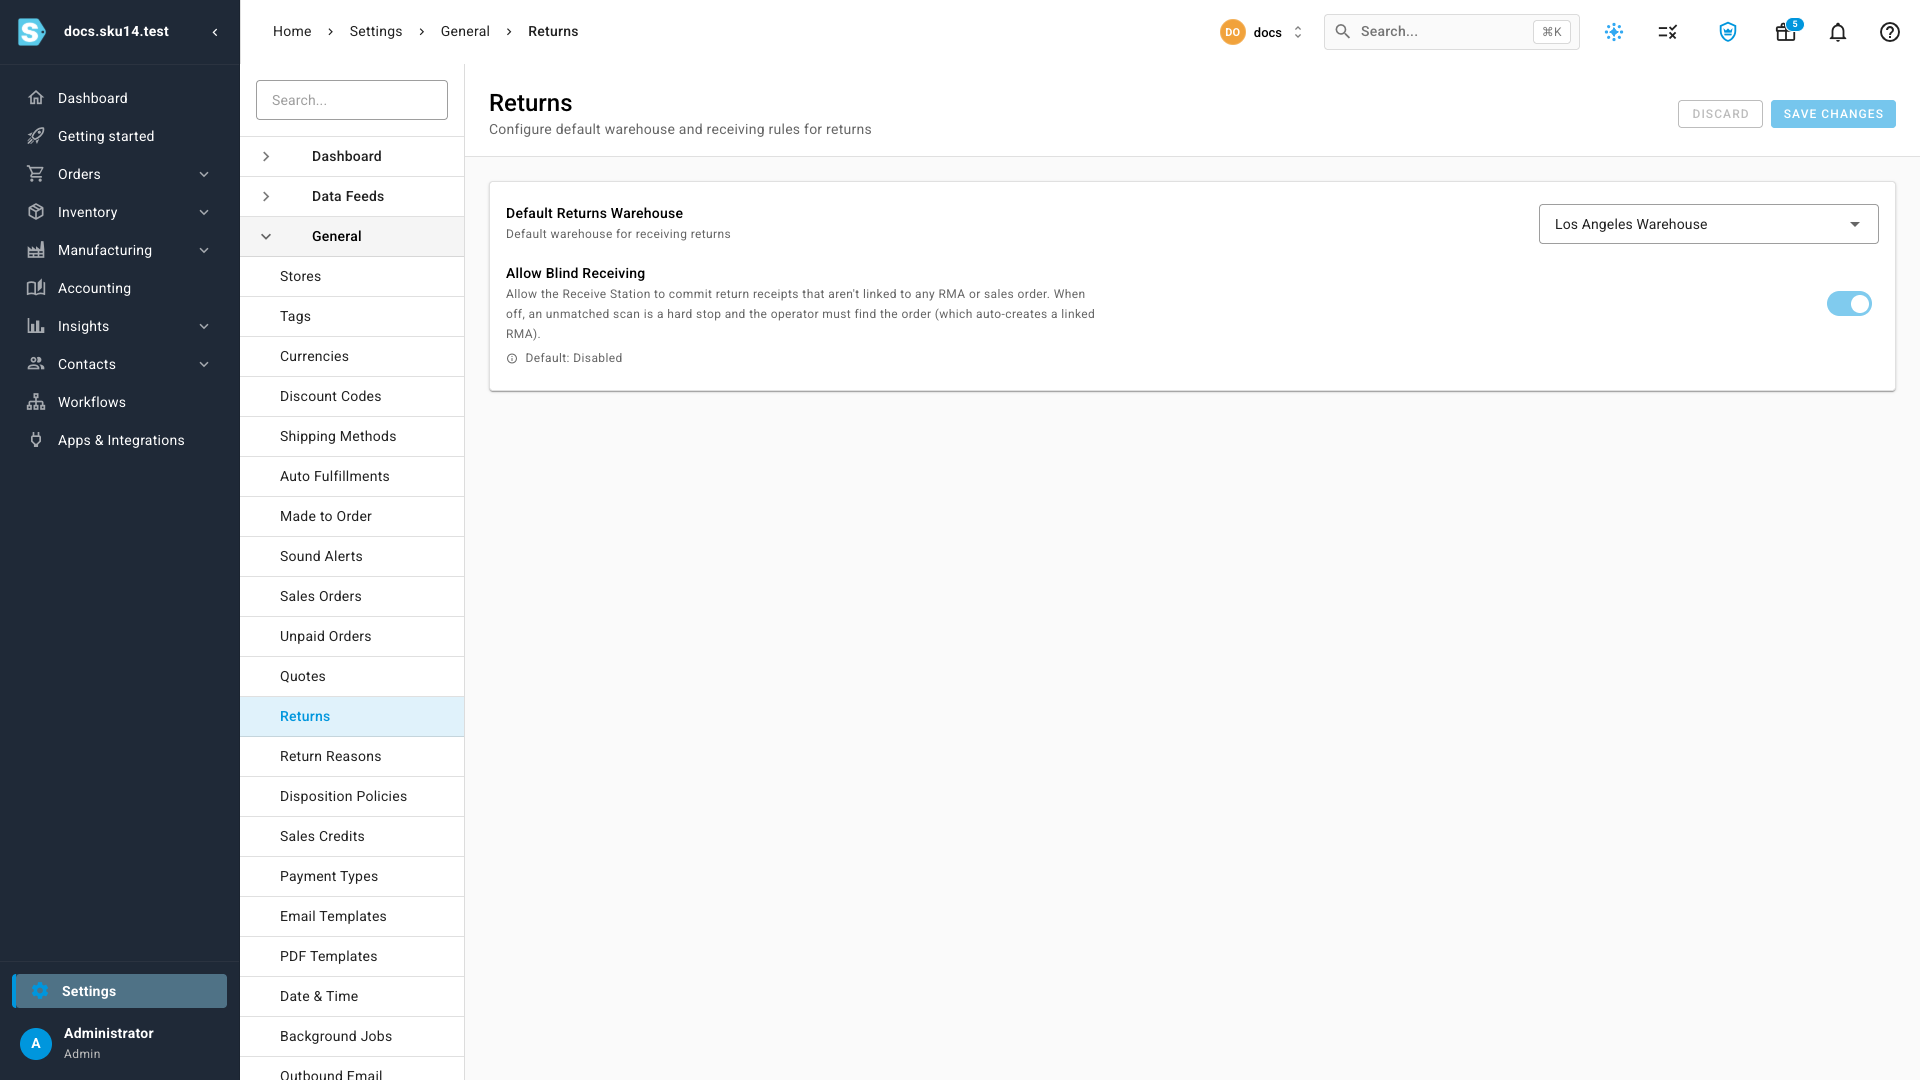
Pick a warehouse in Default Returns Warehouse. This is the fallback returns land in when a channel or an incoming return doesn't name one of its own — for example a marketplace return with no warehouse on it. On the docs tenant it's set to Los Angeles Warehouse. Click Save Changes (or Discard to back out).
Point this at the warehouse where returned goods physically arrive. If that's a dedicated returns or quarantine location, see step 4 — you'll usually want it excluded from demand planning too.
2. Choose whether to allow blind receiving
On the same page, Allow Blind Receiving is a single toggle, Disabled by default. Its on-screen help reads:
Allow the Receive Station to commit return receipts that aren't linked to any RMA or sales order. When off, an unmatched scan is a hard stop and the operator must find the order (which auto-creates a linked RMA).
This is the one returns setting with a real trade-off, so decide deliberately:
| ON | OFF (default) | |
|---|---|---|
| Unmatched scan at the Receive Station | Stages a blind line — real stock, no RMA behind it | Hard stop — the operator must find the order first |
| Dock speed | Fast — parcels land even before an RMA exists | Slower — every receipt must attach to an order or RMA |
| Accounting | Looser up front; receipts reconcile later | Tighter — every receipt is tied to a record on arrival |
| Where blind receipts go | The Unmatched Returns queue, to be linked afterward | n/a — nothing is left unmatched |
Turn it ON when parcels arrive faster than staff can look them up and you're willing to work a reconciliation queue. Leave it OFF for the safest accounting, where nothing enters stock without an order or RMA attached — an unmatched scan then forces the operator to find the original order, which auto-creates a linked RMA on the spot.
Blind receipts don't stay orphaned: they surface in the Unmatched Returns report and settle when someone links them. For the full picture of where they land and how they clear, see How returns reconciliation works.
3. Maintain return reasons
Go to Settings → General → Return Reasons (route /v2/settings/return-reasons). This is the list operators choose from when they authorize or receive a return.
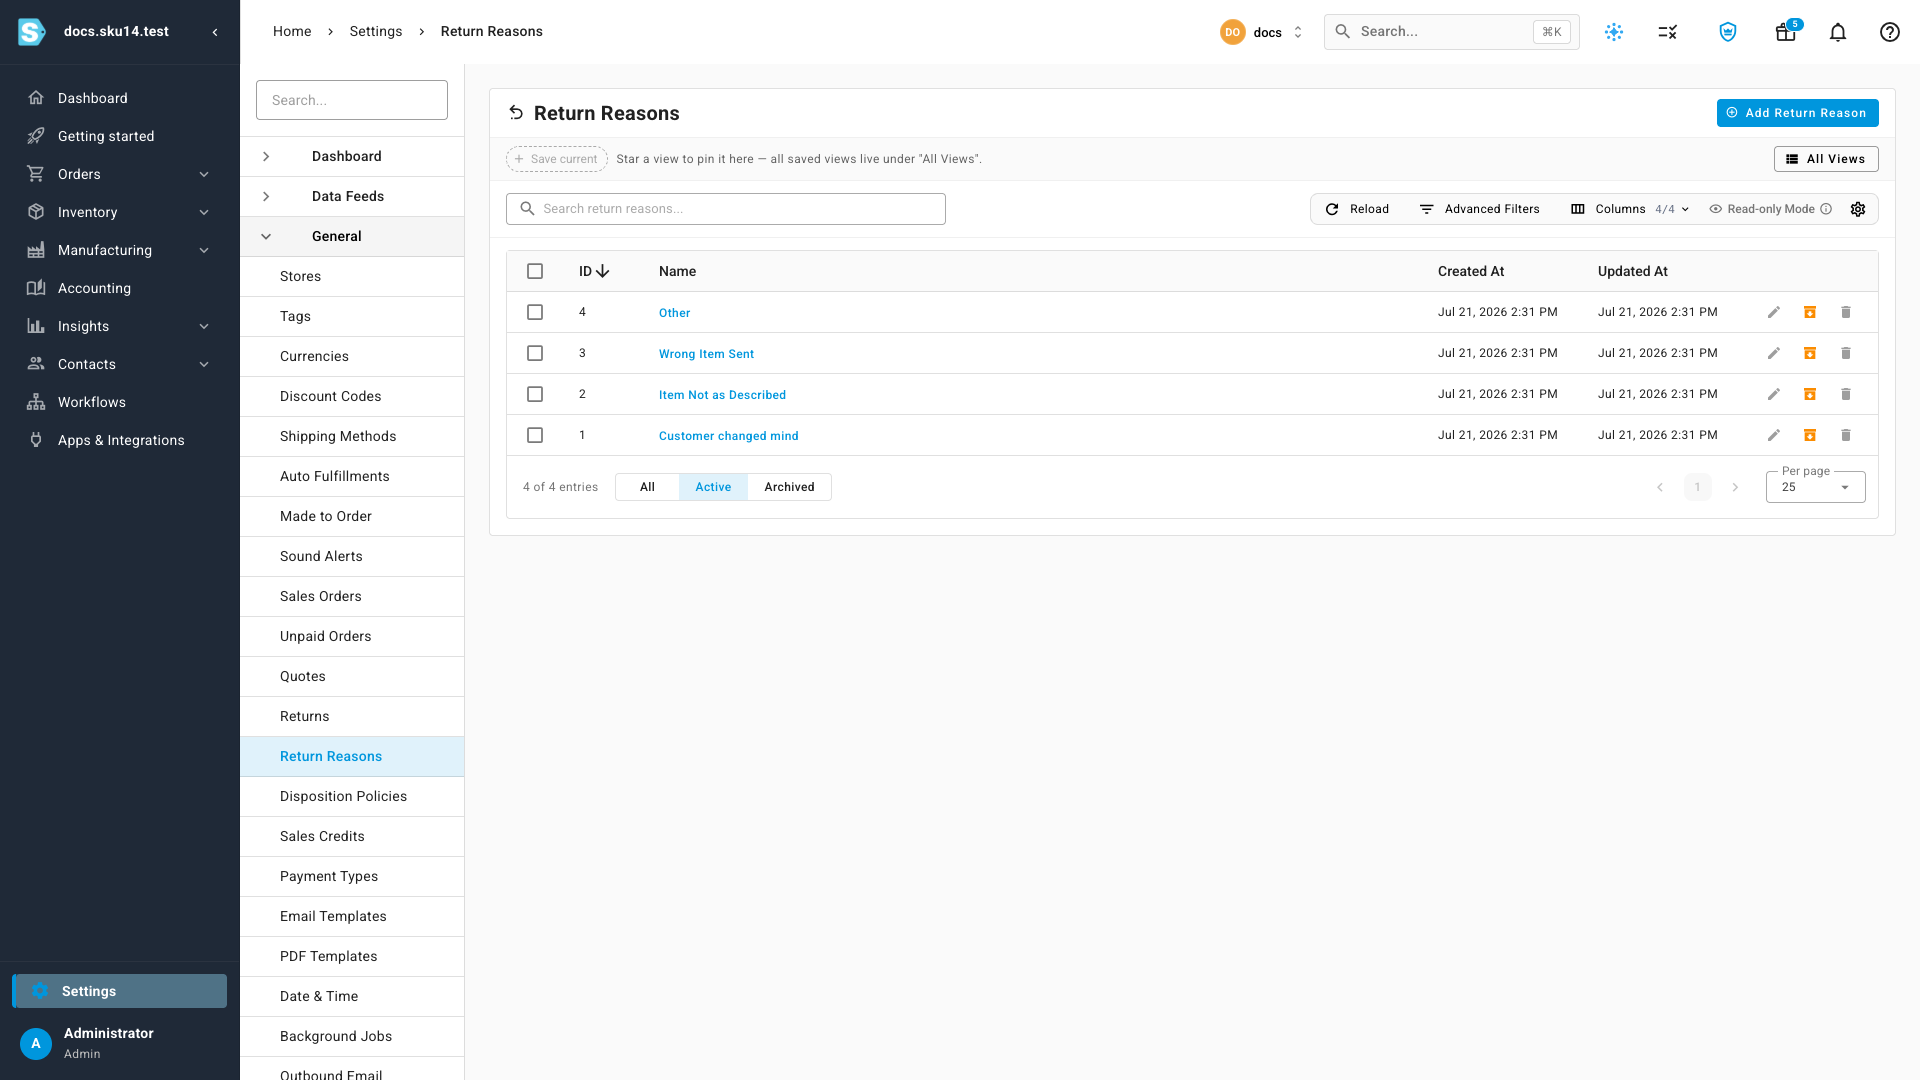
The docs tenant ships with Customer changed mind, Item Not as Described, Wrong Item Sent, and Other. Manage the list from here:
- Add Return Reason creates a new one.
- The pencil edits a reason's name.
- The archive icon hides a reason from new selections without deleting it — the All / Active / Archived tabs filter the list.
- The trash icon deletes a reason, but delete is blocked if the reason is already used by an RMA or a receipt line. Archive those instead.
Return reasons pull their weight in three places: they appear on RMA lines, they're captured as the Reason on each receive disposition, and they're a match criterion for disposition policies — so a policy can, for example, auto-discard anything returned as "Wrong Item Sent." Set up the reasons you'll actually report on before you build policies around them.
4. Keep a returns warehouse out of demand planning
The last setting lives on the warehouse itself. Go to Contacts → Warehouses, open the warehouse, and open its Settings. Near the bottom of Warehouse Settings is the Exclude from Purchasing / Demand Planning toggle.
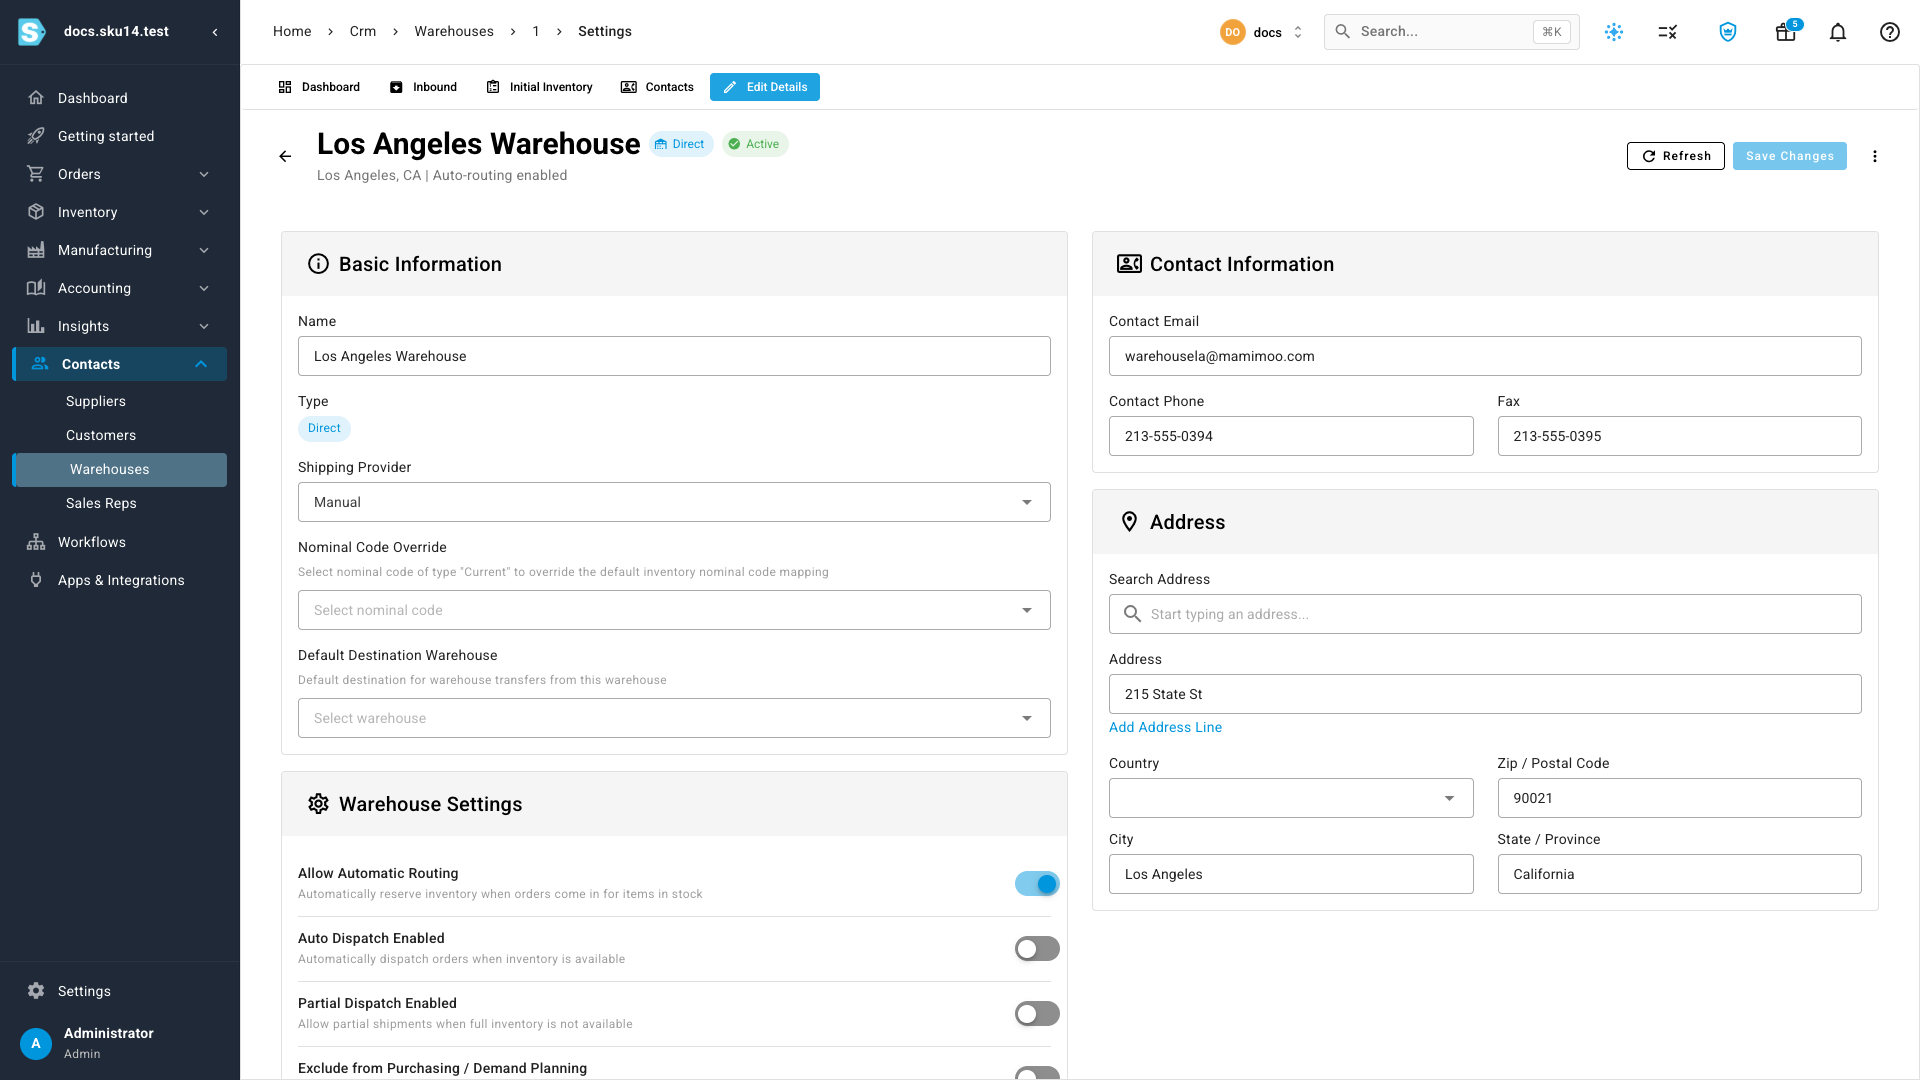
When this is ON, the warehouse's stock stays fully visible and reportable, but it does not reduce suggested supplier order quantities and does not count as inbound supply in demand planning. Turn it on for a returns or quarantine warehouse: the returned, blemished, or held units sitting there shouldn't make it look like you have more sellable inventory than you do, and shouldn't suppress reordering of the real stock your customers can buy.
One deliberate seam: this flag is not applied to Amazon FBA report inventory, which is keyed per integration instance rather than per warehouse. Excluding a warehouse won't change how FBA-reported stock feeds planning.
Related
- Receive returns at the Receive Station — where the blind-receiving setting takes effect.
- Set up return disposition policies — the rules that match on return reason and grade.
- How returns reconciliation works — where blind receipts go and how they settle.
Video transcript
Four settings govern how returns behave. Under Settings → Returns, pick the default warehouse returns land in. Decide whether to allow blind receiving — on is fast but reconciles later, off ties every receipt to an order. Then maintain your return reasons, which drive RMA lines and disposition policies. Finally, exclude a returns warehouse from demand planning so held stock never suppresses reordering.