Build a workflow from scratch
A template is the fastest start when one fits your job. When none does, you build your own on the canvas: add a trigger, chain the steps you need, and publish. This guide covers the moves that apply to every workflow — the unsubmitted-PO email reminder is a worked example built entirely this way.
Before you begin
- Read How workflows work so the pieces — trigger, nodes, and the draft-to-active lifecycle — are familiar.
- Know what you want: what starts the workflow (a schedule, an upload, an event) and what should happen after.
- A few nodes need a credential (an FTP server, a Google Account, a Slack webhook). Set those up first under Workflows → Credentials if your steps need them.
Start a blank workflow
- Go to Workflows and click New Workflow.
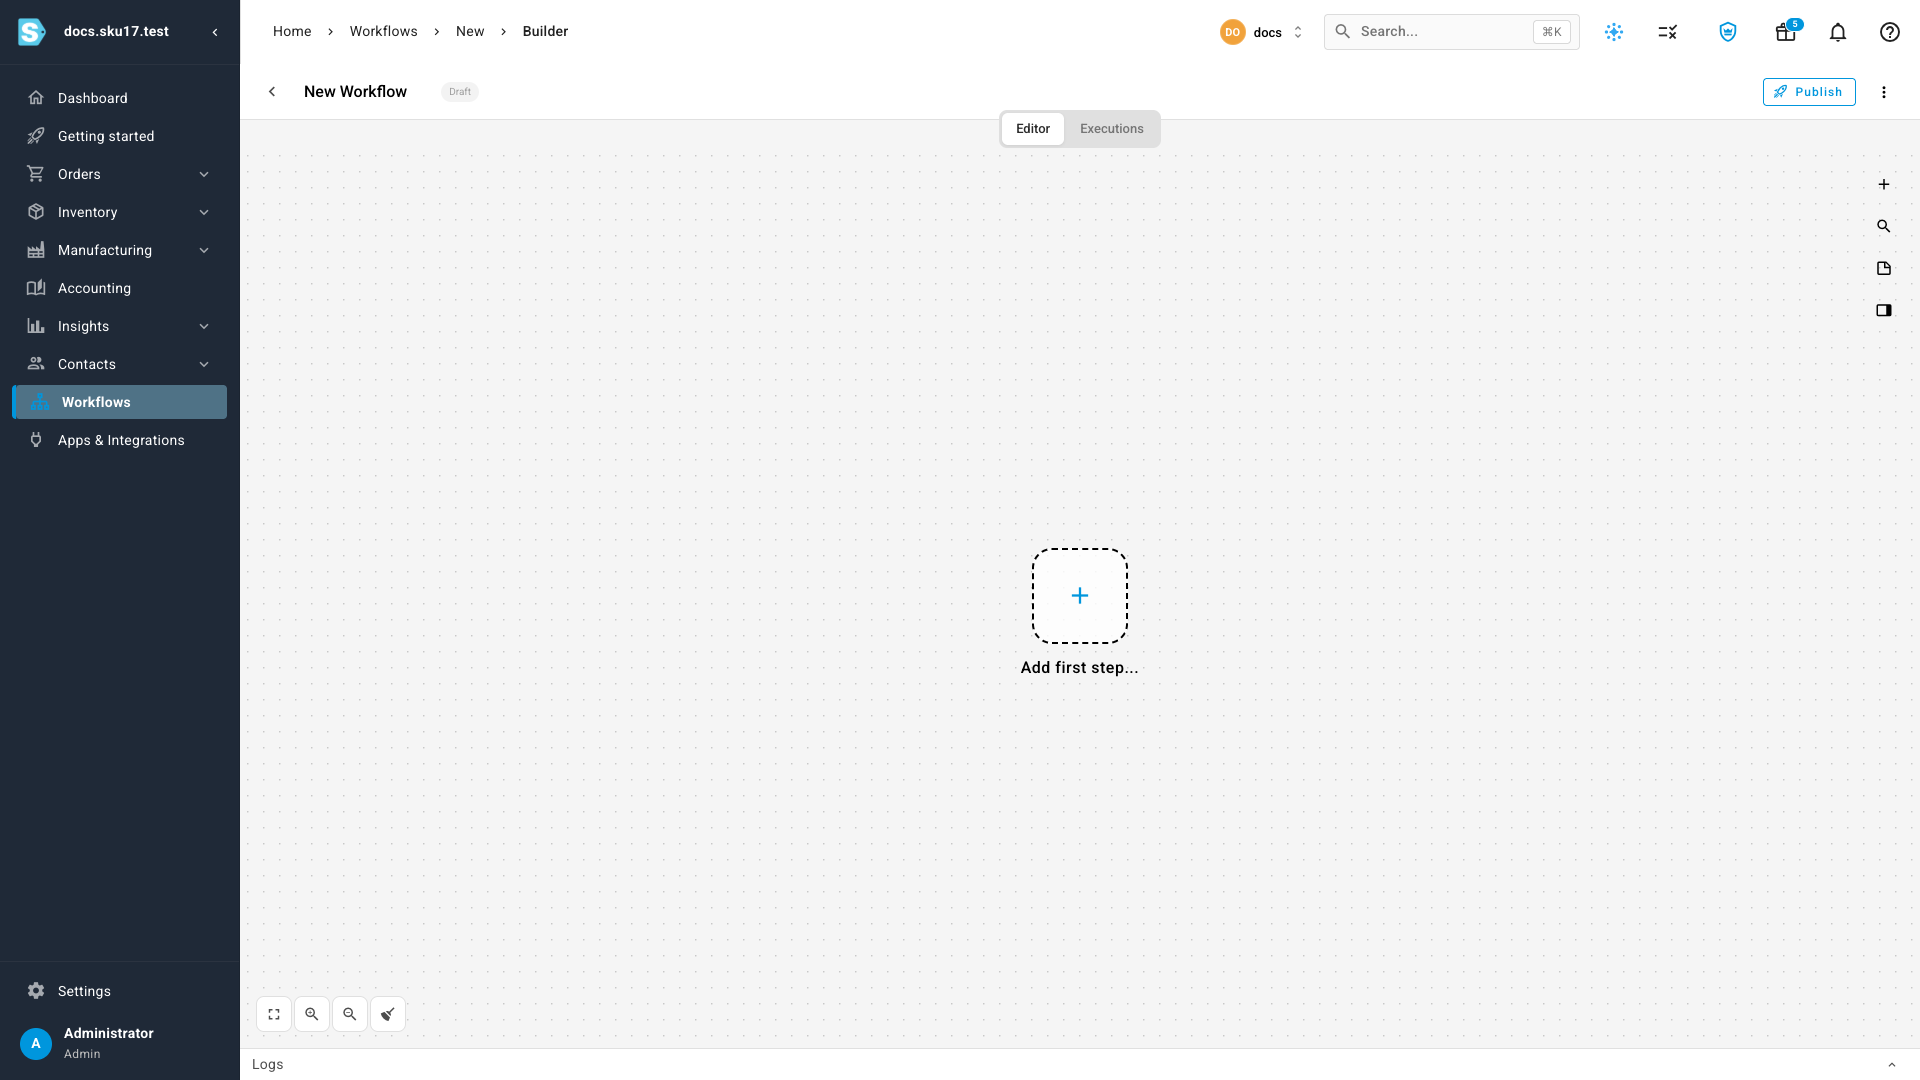
- You land in the builder with an empty canvas and an Add first step… prompt in the middle.
Add the trigger
Every workflow starts with exactly one trigger — the thing that makes it run.
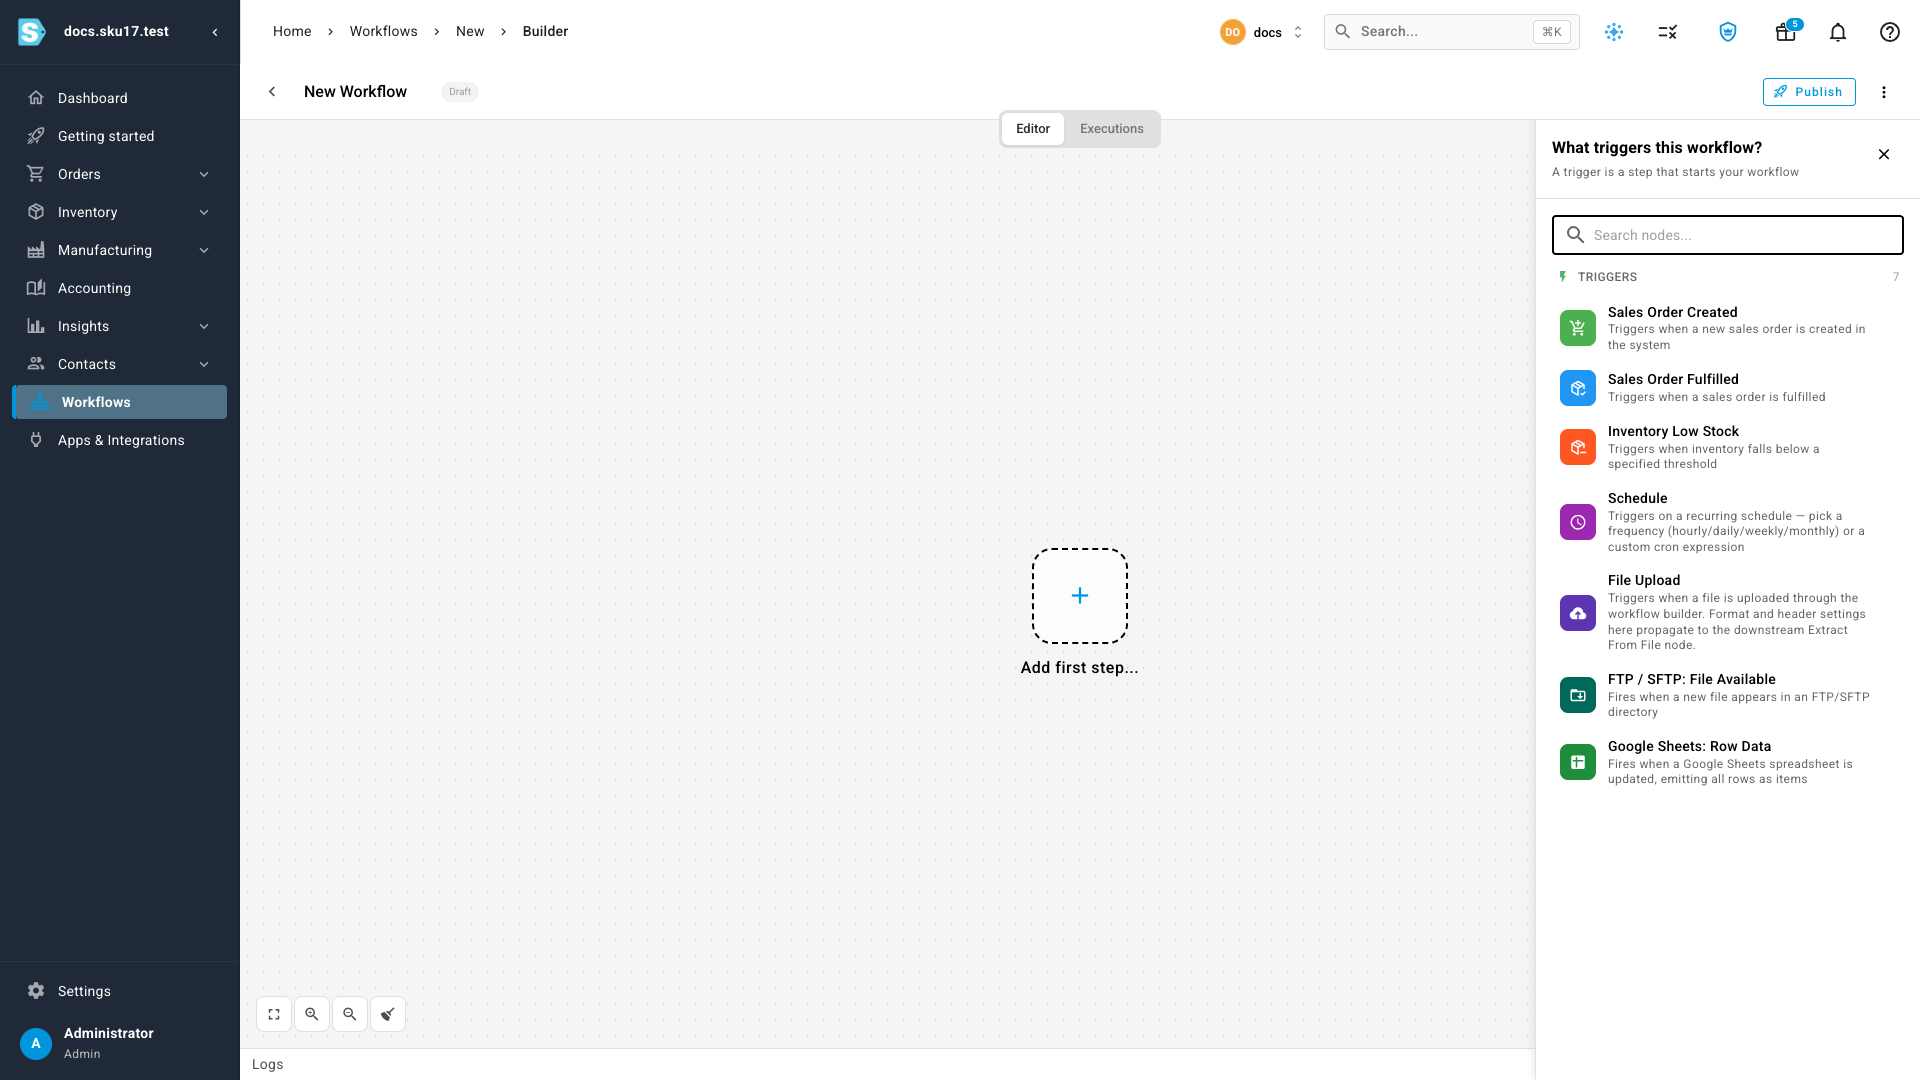
- Click Add first step…. The Node Palette slides in from the right, with nodes grouped by category — Triggers, Actions, Logic, Integrations, Utilities.
- Open Triggers and pick one — for example Schedule (runs on a cadence), File Upload, or an event like Sales Order Created. The trigger drops onto the canvas as your first step.
Chain the next nodes
Nodes run left to right, each passing its result to the next.
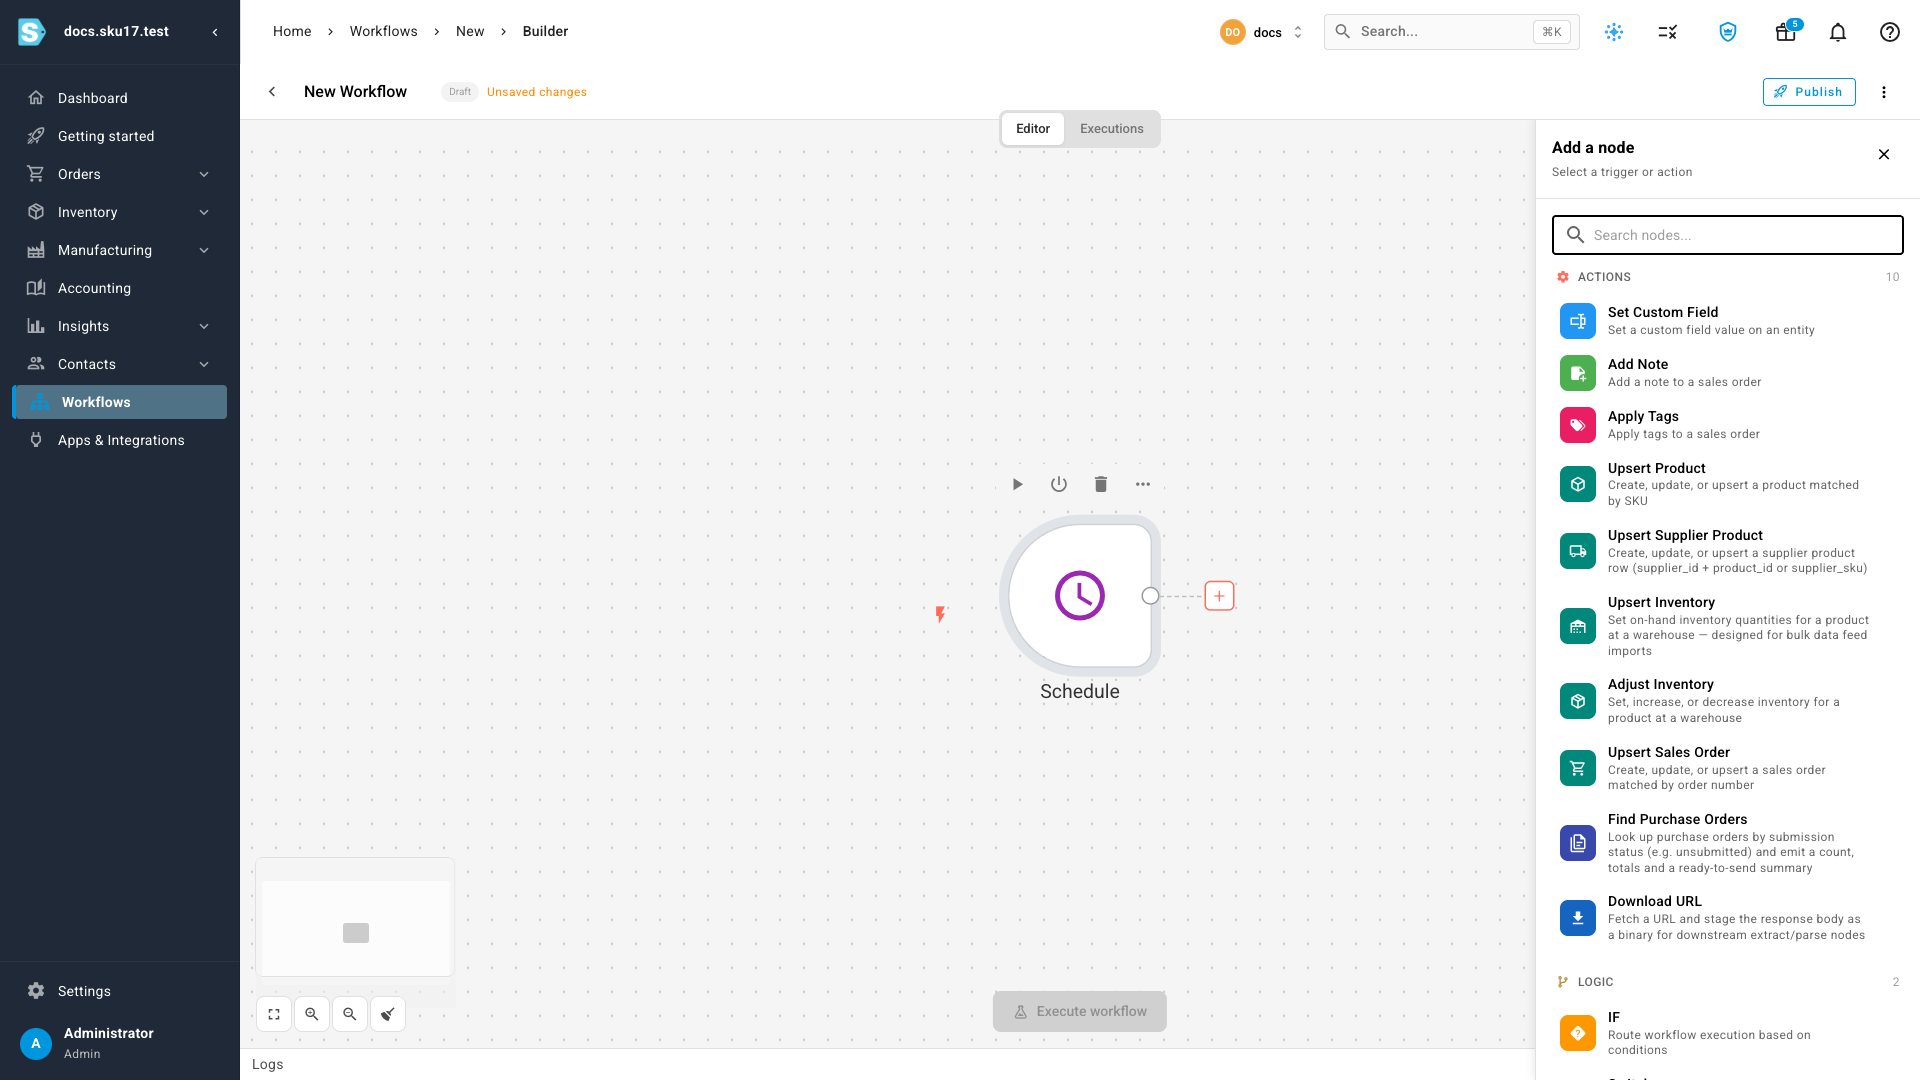
- Hover the node you want to continue from and click the + on its right edge. The palette reopens.
- Pick the next node. It's added and connected to the previous one automatically — no dragging required. (You can also drag a node straight from the palette, press N, or use the Ctrl/⌘ + K command bar.)
- Repeat until the flow is complete.
Configure each node
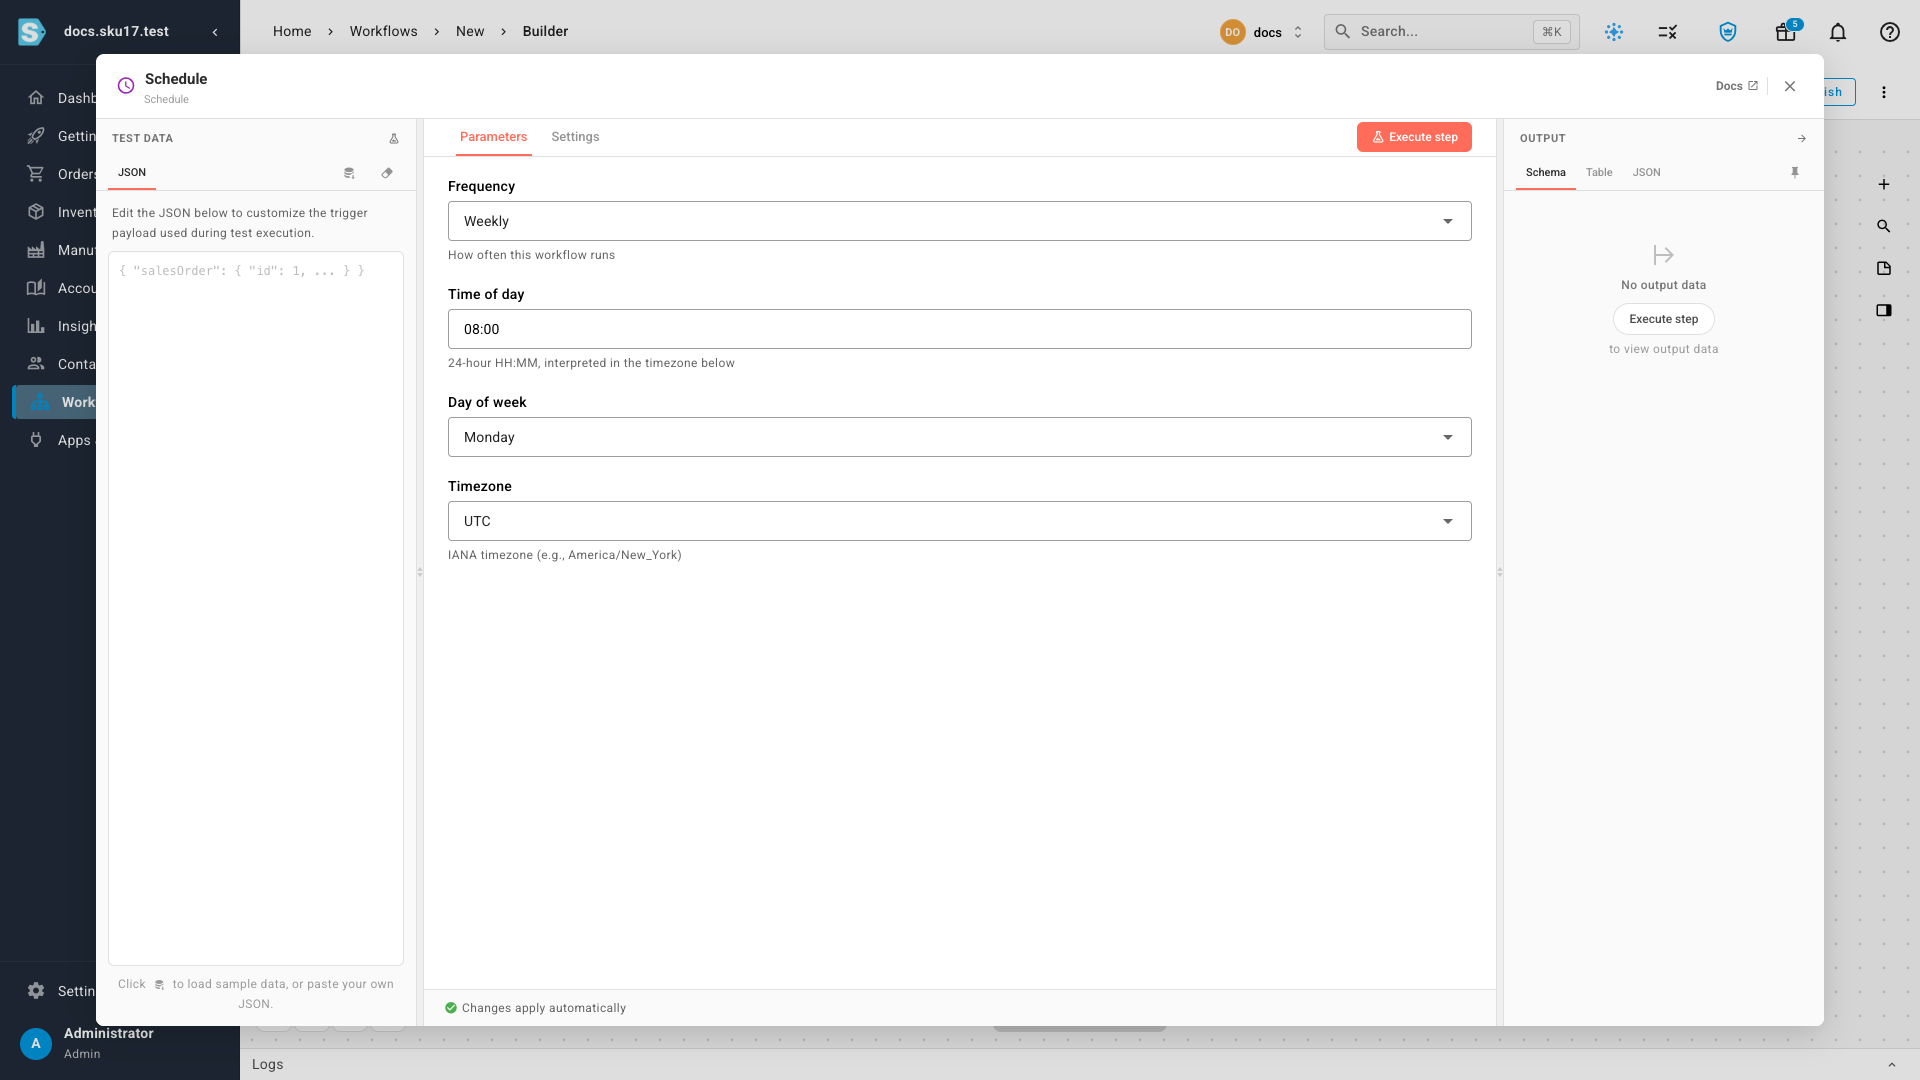
- Click a node to open its settings panel on the right.
- Fill in the fields. Each node has its own — a Send Email node asks for To, Subject, and Email Body; a Schedule node asks for a Frequency and Timezone.
- To reuse a value from an earlier step, use an expression — see Reference an earlier step's data below.
Reference an earlier step's data
Fields that accept expressions — a Subject, an Email Body, an IF condition — can pull in data from an earlier step. Click Insert field above the box to pick from the trigger's data and every upstream node's output (each entry shows what it produces), or type the reference yourself:
{{ $json.<field> }}— data from the trigger (for example,{{ $json.salesOrder.salesOrderNumber }}).{{ $nodes.<node>.<field> }}— an earlier node's output, named by its type (for example,{{ $nodes.find-purchase-orders.count }}).
A reference on its own returns the raw value, so an IF condition can compare it as a number. Dropped into a sentence, it's substituted in place.
You have {{ $nodes.find-purchase-orders.count }} orders to review
Loop over a list. When a step outputs a list, repeat a block once per item with
{{#each }}, and reference the current item with {{ this.<field> }} (or the item's
position with {{ $index }}):
{{#each $nodes.find-purchase-orders.purchaseOrders }}
• {{ this.purchaseOrderNumber }} — {{ this.supplierName }} — {{ this.url }}
{{/each}}
Picking a list field from Insert field drops a ready-to-edit {{#each }}
block in for you.
Rename a node
Give a node a name that reads well in the graph. Click its name at the top of the settings panel and type. The node's type stays shown just beneath the name, so you never lose track of what it actually is.
Branch with logic
To do different things depending on the data, add an IF node. It evaluates your Conditions and splits into two outputs — True and False.
- Add an IF node from the Logic group and set at least one condition (and choose AND or OR if you have several).
- Continue the path you care about by clicking the + on the True (or False) handle and adding the next node there.
Name and publish
- Click the workflow name in the header and type a clear label — it's how you'll find the workflow in your list later.
- When the flow looks right, click Publish. The workflow flips from Draft to Active and runs whenever its trigger fires.
To stop it, click the same button to unpublish back to Draft (or turn it off) — your build is kept, it just stops running. Every run is recorded under the Executions tab so you can see what ran, when, and whether it succeeded.
Next steps
- Get an email reminder about unsubmitted purchase orders — the same moves, start to finish, for a real reminder.
- How workflows work — triggers, nodes, and the lifecycle.
- Create a workflow from a template — when a ready-made one fits.
Video transcript
To build a workflow from scratch, open a New Workflow and click Add first step. Every workflow begins with one trigger — here, we'll use a Schedule. Click any node to open its settings. Fill in its options, and rename it if you like — the node's type always stays shown beneath the name. To add the next step, click the plus on a node's edge and pick from the palette. It's added, and connected, automatically. Add logic to branch the flow. An IF step splits into a True and a False path, so different things can happen depending on your data. Continue building along the branch you want — here, sending an email on the True path. When the flow looks right, name it and click Publish. Draft becomes Active, and it runs whenever its trigger fires.